

How To Install Stacked Wall Cabinets
After ii years of living in our new dwelling, I can finally say my dream kitchen is consummate! I've been dreaming of calculation DIY stacked kitchen cabinets since the day we decided to build this business firm and I'm so happy to finally be sharing the finished product with you guys! (All the sources, products, and tools I used are linked at the bottom of this post!)

Brand sure you check out my DIY Stacked Kitchen Cabinets post on the Home Depot Blog Hither !

When nosotros congenital our home we were overwhelmed with the amount of blueprint choices that needed to exist made and non to mention the toll tags associated with the upgrades we were looking for. I knew my dream kitchen consisted of having stacked cabinets throughout, however our budget didn't agree with that dream. Just when I learned that our builder supplied Timberlake cabinets (which is sold through the Dwelling Depot as American Woodmark) I knew I could purchase them at a later date to save money!
The Before

This is our business firm the day we closed and it became ours. I was head over heels in beloved, but knew there was so much more than I wanted to add to reflect my mode. All I saw was a bare canvas with tons of potential! Shortly after nosotros moved in I added pendant lights, a backsplash, decorative cabinet panels, and hardware which you can read all about hither. I also recently wrote a post here where I went into more particular virtually the plans for my DIY stacked kitchen cabinets if you demand to get defenseless up before I swoop right into how I actually completed them.
Step 1: Remove Crown Molding

I removed the crown molding from my cabinets as carefully as possible since I wanted to reuse it on the new stacked cabinets at the terminate. I scored the caulk the architect placed behind the crown with a razor blade and gently pried the crown away from the cabinets using just my hands. Fortunately there were only a few small pin nail holes in the fronts of the cabinets that I patched with white wood filler and the smallest dab of white paint I had in the garage.

The filler pieces you see above the cabinet in the photo actually had to be removed, and trimmed downwards with my table saw. I needed an even surface to set the new cabinets on and that particular filler was about an inch too alpine (the crown was covering information technology previously).
Step ii: Add Trim

Since I am copying the 2 stacked cabinets that our builder installed in the center of my kitchen, I needed to apply the same trim that went between the lower and upper stacked cabinets. I'g not certain if this is standard or protocol for calculation stacked cabinets but I actually don't mind the look at all! I've seen it both ways then I'1000 sure it's a affair of preference. I let the trim overhang the front end nearly an inch and only slightly on the sides. You lot tin also see from this photo that I built up the backside of the cabinets against the wall. If I hadn't added this height back in that location, the new stacked cabinets would not have had an even surface to sit down on.

I glued the trim on the underneath side to the superlative of the cabinets and secured with a couple small brad nails. I clamped the corners while the glue stale as I wanted them to exist as tight as possible.
Step 3: Set New Cabinets
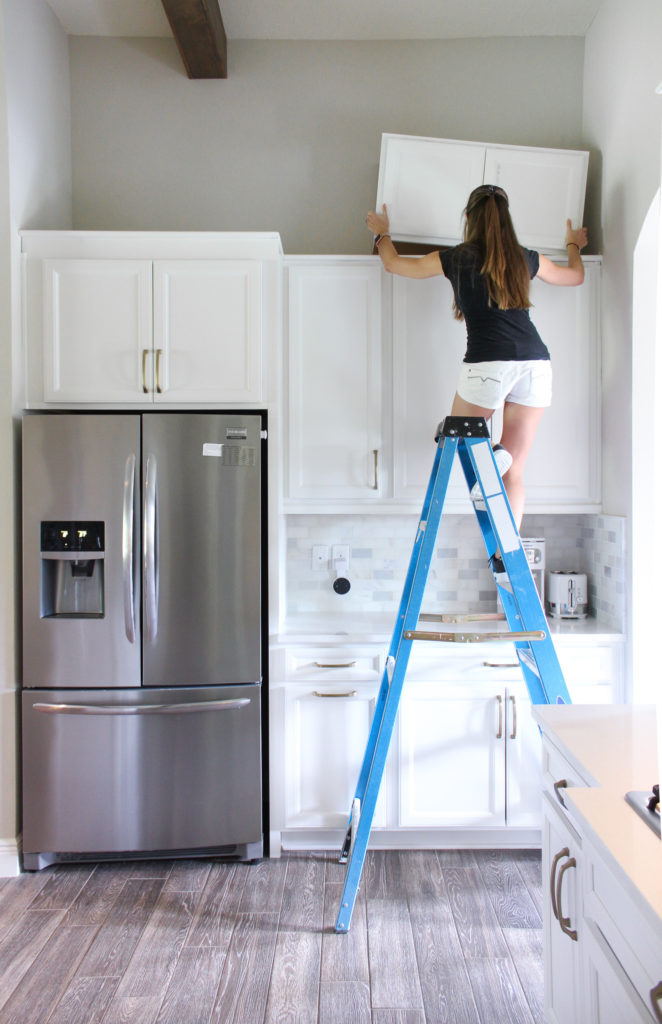
In one case the trim was complete the next step was to set all the cabinets in place. I had 6 cabinets in total for both sides of the kitchen. v double door cabinets and one single door. Surprisingly they weren't that heavy!

But the two deeper cabinets over the appliances definitely required an extra set of hands due to their size! I rarely always ask for assist (and honestly hate to) but there was no style I was doing this alone.

I did not secure the cabinets in any mode until afterward the fillers were completed in the next stride below.
Step four: Add together Fillers

Cabinets near never fill your space perfectly from wall to wall and therefore crave fillers. In my case, I had to add fillers along the wall sides and in the gap betwixt the cabinets seen above.
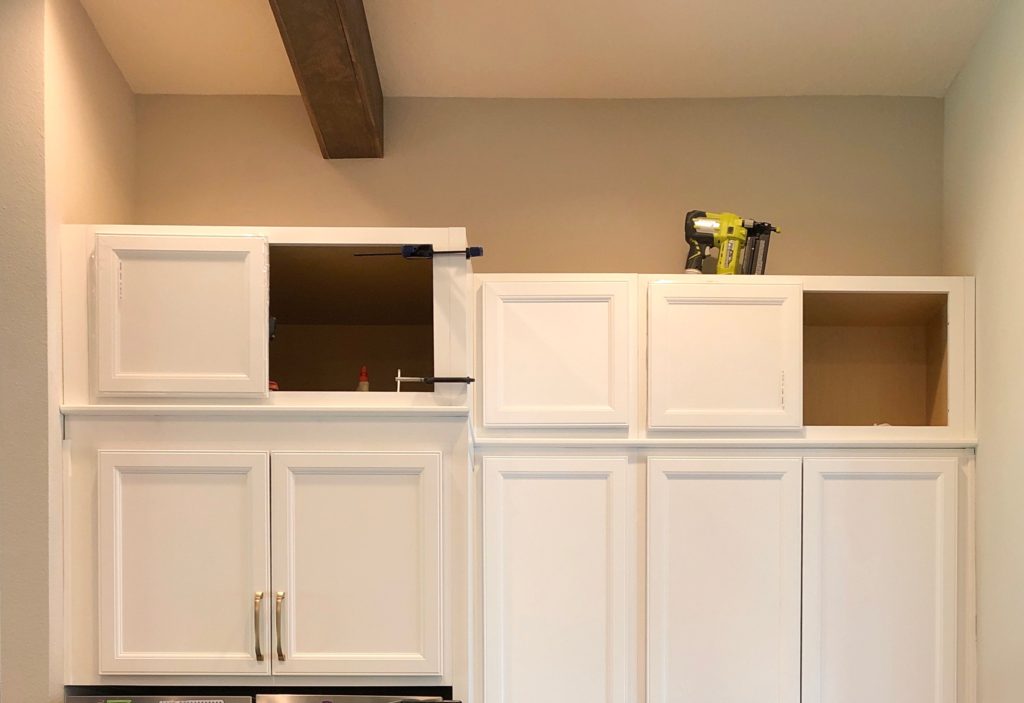
Fillers come up in 3-iv″ strips that yous cut down to fit the infinite yous need. In the photo above you lot can meet a filler on the left and right side against the walls, and the one in the middle beingness clamped on. I clamped the fillers in place while I drove screws through the inside of the face frames into them. To get the fillers against the walls in, I had to pull the chiffonier away from the wall and bending it to fit a clamp in there. This is why I hadn't anchored the cabinet boxes to the wall yet.

This is when I finally attached the cabinets to the wall using 2.v″ screws into the studs from the tops of the cabinets.
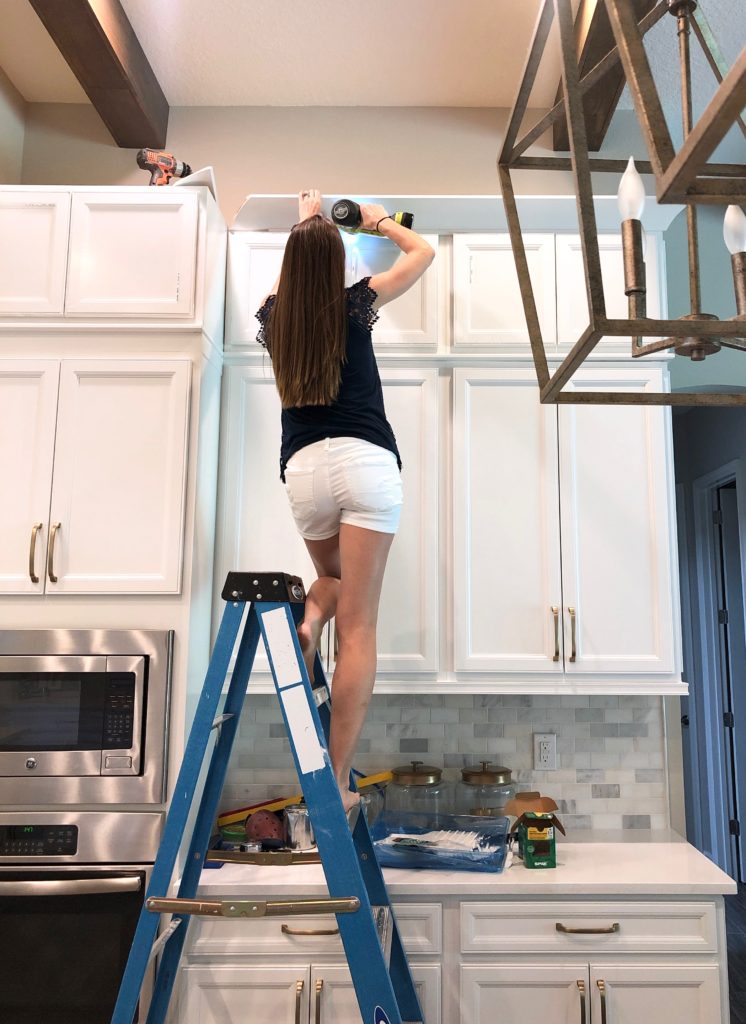
Step 5: Install Crown Molding & Scribe Molding

After all the fillers were in place, I starting putting dorsum up the crown that I removed in step 1. The play a joke on to doing this alone was creating a guide. Since the crown needed to sit 5/8″ above the doors, I cutting a scrap slice of wood to v/8″ thick and placed it above the doors for the crown to rest on. You tin see me holding it in the photo to a higher place.
I fabricated sure to dry out fit all of the pieces of crown before I nailed them in with my nailer. (i.25″ xviii gauge) A couple pieces were a hair likewise long which I trimmed on my miter saw and i that met a wall was likewise short so more caulked solved that!
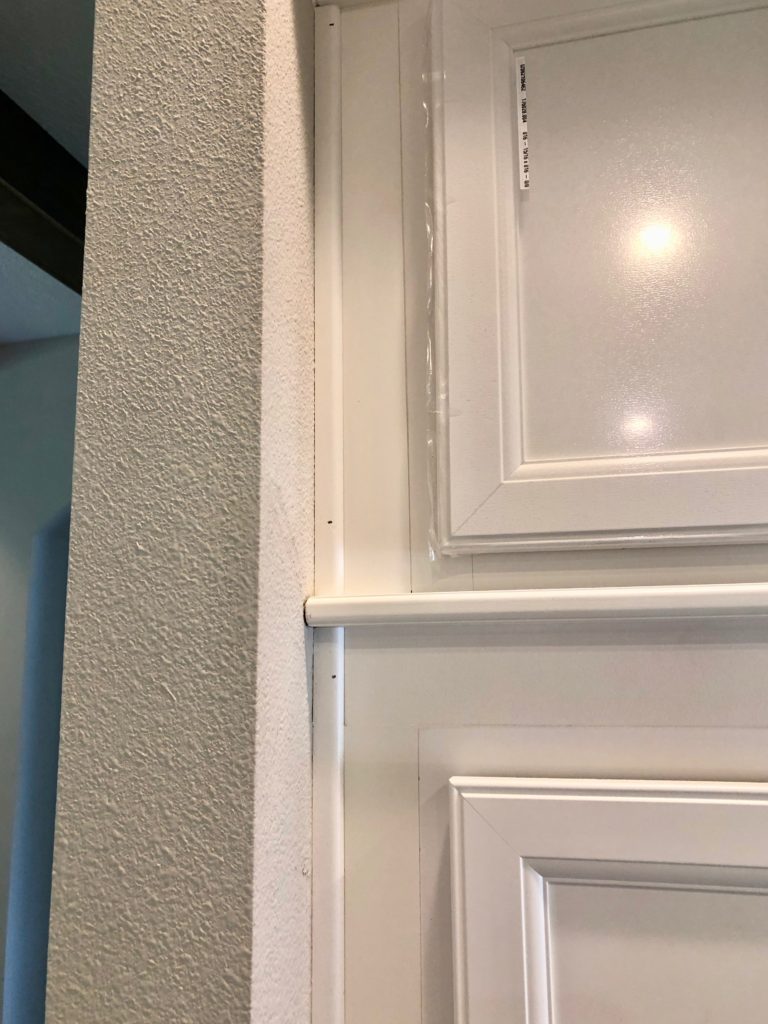
The scribe molding covers whatsoever modest gaps between the wall and cabinets and just gives an overall finished expect. My kitchen had this initially then I ordered more to terminate off the sides of the new uppers every bit well to match everything. I used my nailer of course and filled the holes with woods filler.
Footstep 6: Add Hardware & Savor!

I was terrified to drill holes into my brand new chiffonier doors if I'thou being honest. Thankfully I remembered I had the Kreg hardware jig in my garage which makes things MUCH less scary and fashion more accurate! I clench it in place with this clamp and this is the drill I have used for years.

I chose knobs from wayfair that match the pulls I have in the residue of my kitchen. I beloved how they coordinate and I at present have a variation of knobs and pulls – which I always felt I was lacking before!
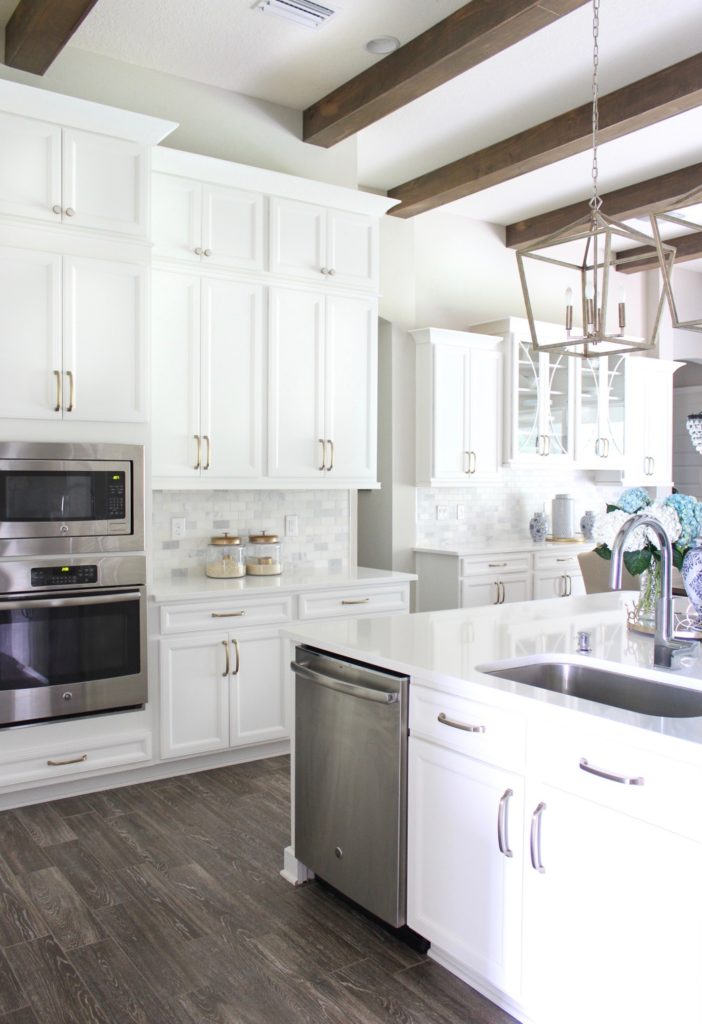
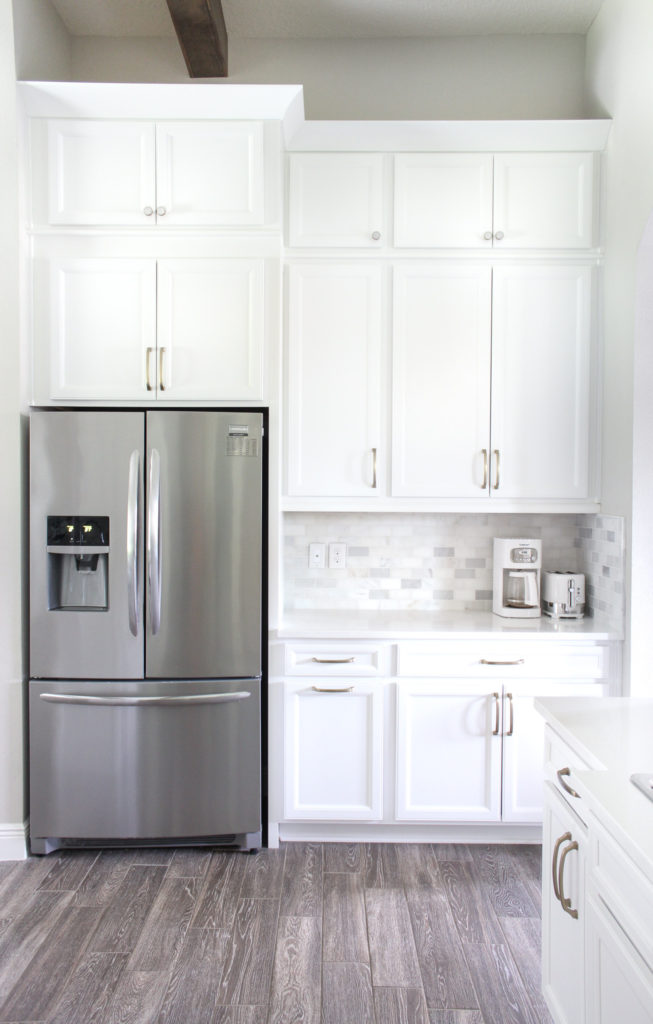
The AFTER


Source Links
FAQ:
Q: Why didn't I add glass to any of the stacked cabinet doors?
A: I already have two glass doors flanking the hood and 4 in the next breakfast nook. I didn't desire whatever more to distract or take abroad from the others and preferred all solid doors.
Q: How much did this project cost?
A: The new cabinets, trim, and fillers from Home Depot cost right around $one,700.
Q: What paint color are your cabinets?
A: My cabinets are actually not made of wood and are non painted. They are made of a newer textile called Duraform and come in a white, foam, and gray.
Q: Are y'all going to add together stacked cabinets to the side by side breakfast room cabinets?
A: No. They are staggered which already provides involvement and I retrieve it looks good as is.
Q: What do you plan on storing in the cabinets?
A: At the moment, zero. I honestly don't need the actress storage I merely think they wait beautiful. Down the road I could encounter myself hiding Christmas gifts in them or storing seasonal decor.
Q: How tall are your ceilings?
A: They are 12′ throughout our kitchen and primary areas. All of the bedrooms are 10′.
Q: Did you lot apply paint to touch up the nail holes?
A: Yeah. This was tricky since my cabinets are non a painted color, and then I plant something every bit close as I could. I had a standard bright white paint in the garage and also some Dover White past Sherwin Williams. I mixed the 2 together, used a tiny dot on the blast hole and it was and then close y'all tin can't tell.


Source: https://www.frillsanddrills.com/diy-stacked-kitchen-cabinets/
Posted by: kaspercourecity1956.blogspot.com
0 Response to "How To Install Stacked Wall Cabinets"
Post a Comment